FTP (File Transfer Protocol) Guide
We recommend using FileZilla FTP client to perform file transfers between Data2Bio servers and your local computer. If your computer does not have the FileZilla FTP client installed already, please use the link below to download and install the client.
https://filezilla-project.org/
Note that only the FileZilla FTP client is needed for the transfers. All additional "options" provided by the FileZilla installer during installation can be omitted (decline installation). Once the application is installed on your computer, please follow the basic steps below for transferring files
Step 1
- Launch the FileZilla client on our computer (Typically located under Applications ➔ FileZilla)
Step 2
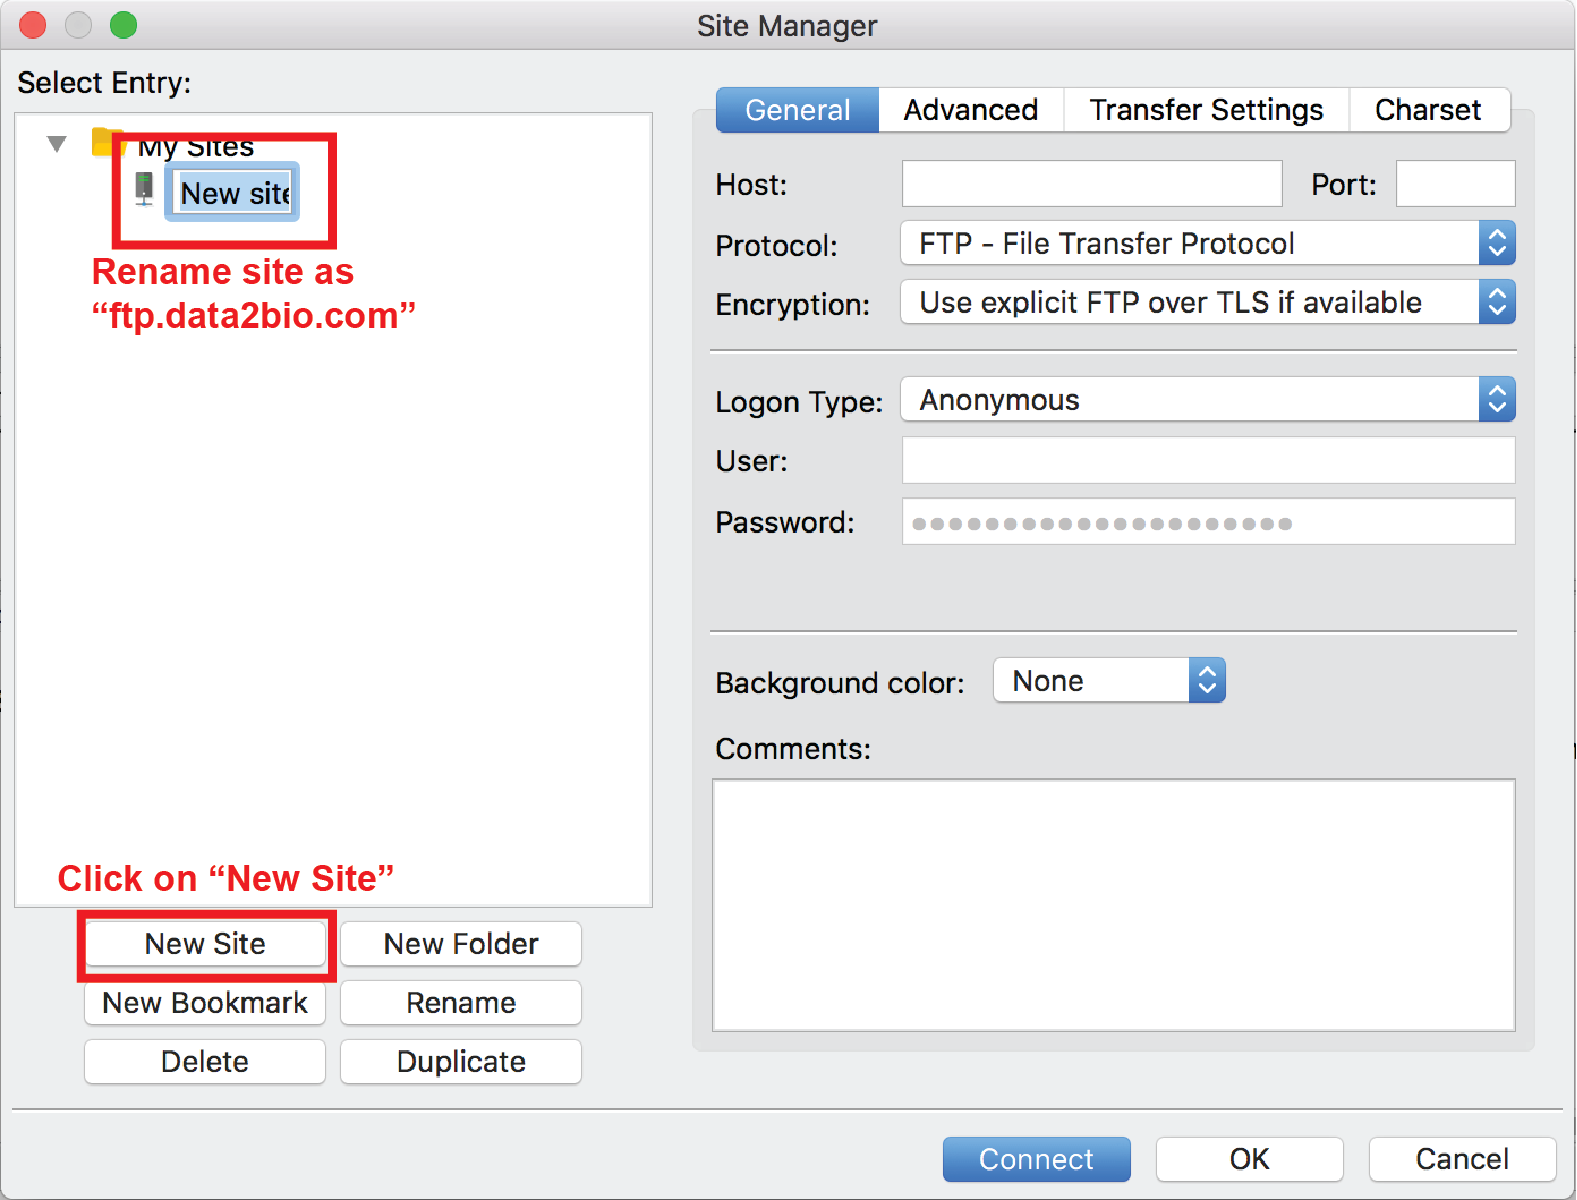
- Once the FileZilla application is open, click on File ➔ Site Manager... from the menu bar to open the site manager window
- Click on New Site button (located on the lower-left of the left panel) and enter ftp.data2bio.com as the new site's name
Step 3
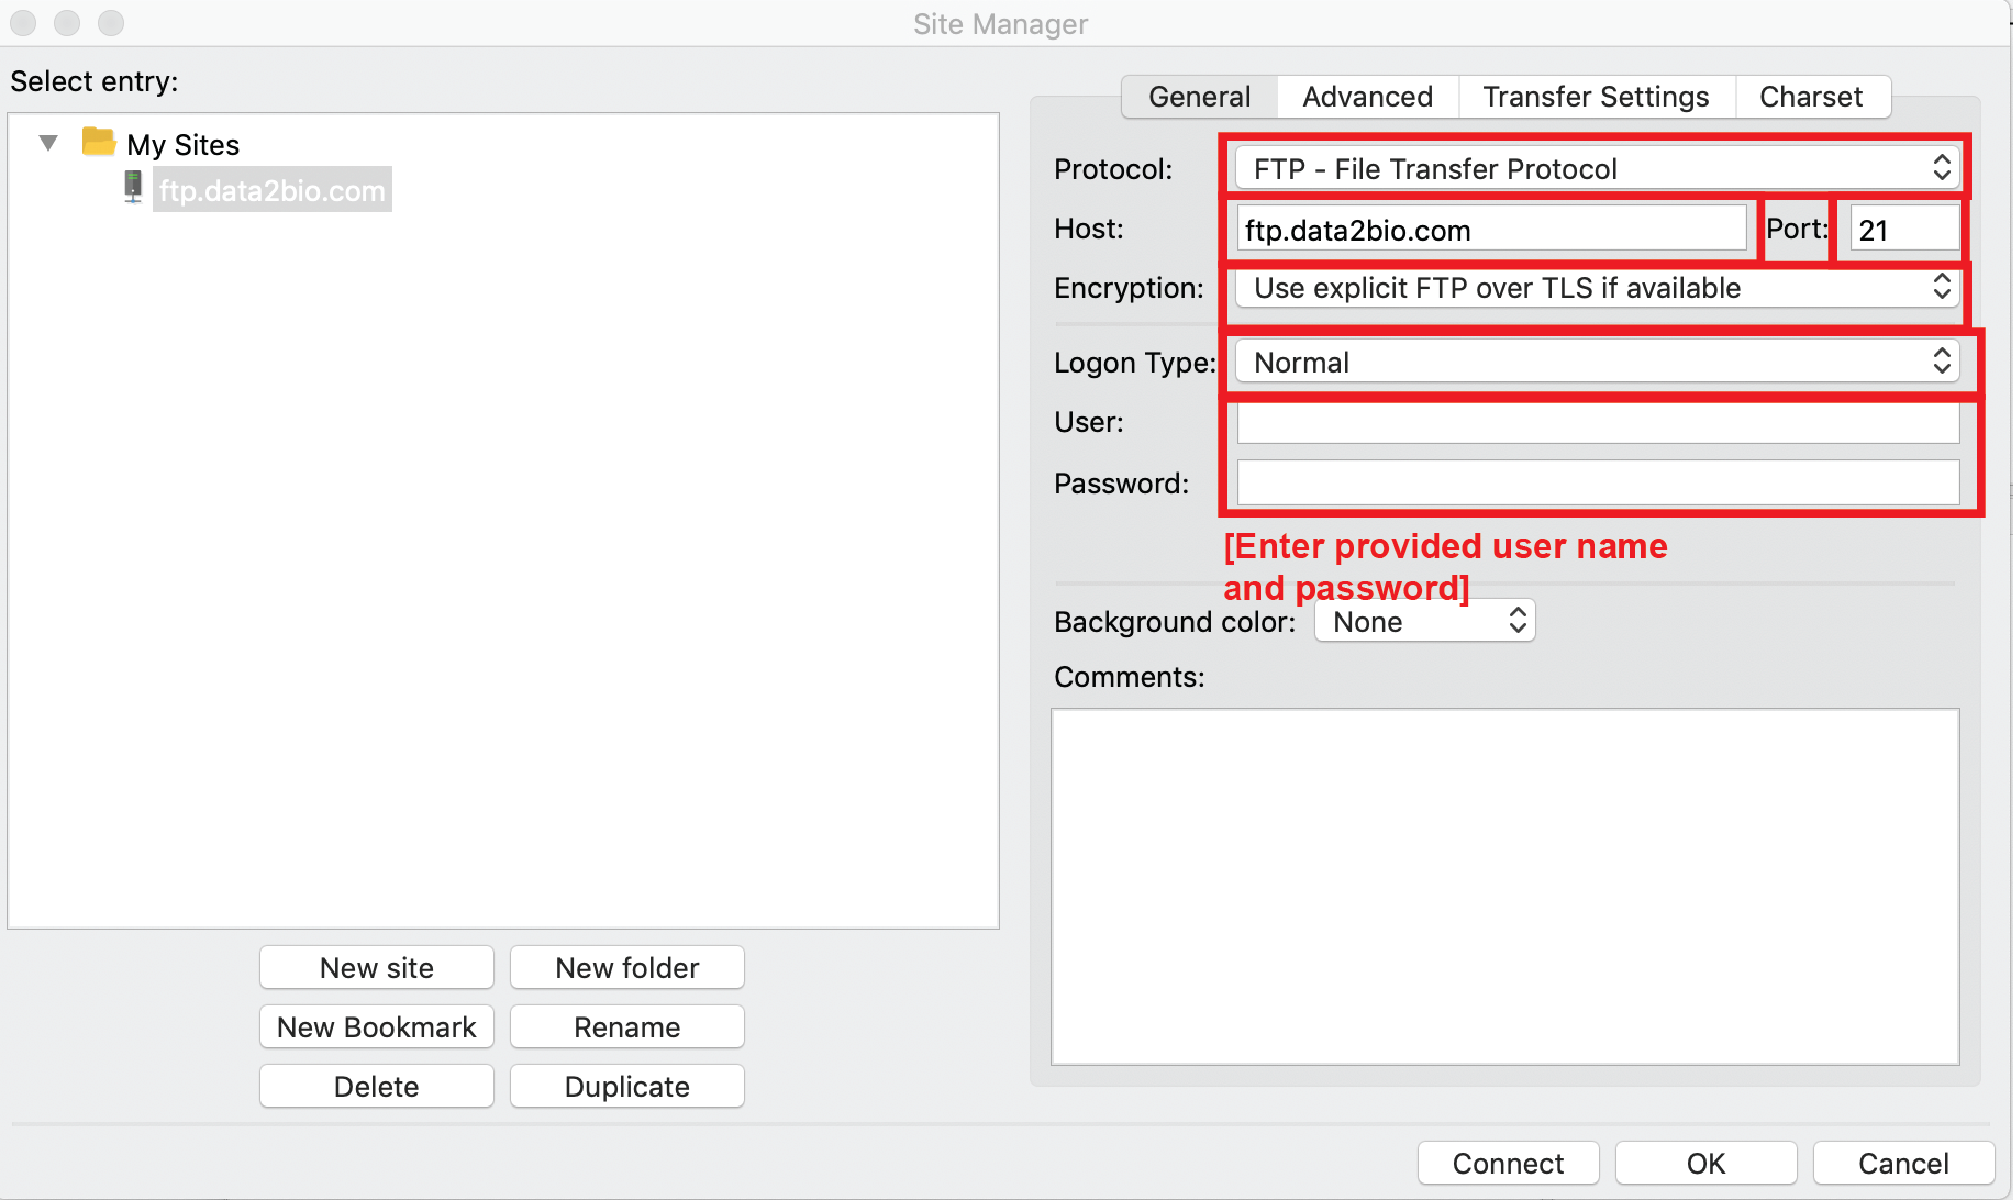
- In the panel located on the right of the site manager window, enter the following:
- Select FTP - File Transfer Protocol under Protocol
- Enter ftp.data2bio.com under Host
- Enter 21 under Port
- Select Use explicit FTP over TSL if available under Encryption
- Select Normal under Logon Type
- Enter the provided login credentials under User and Password fields
Step 4
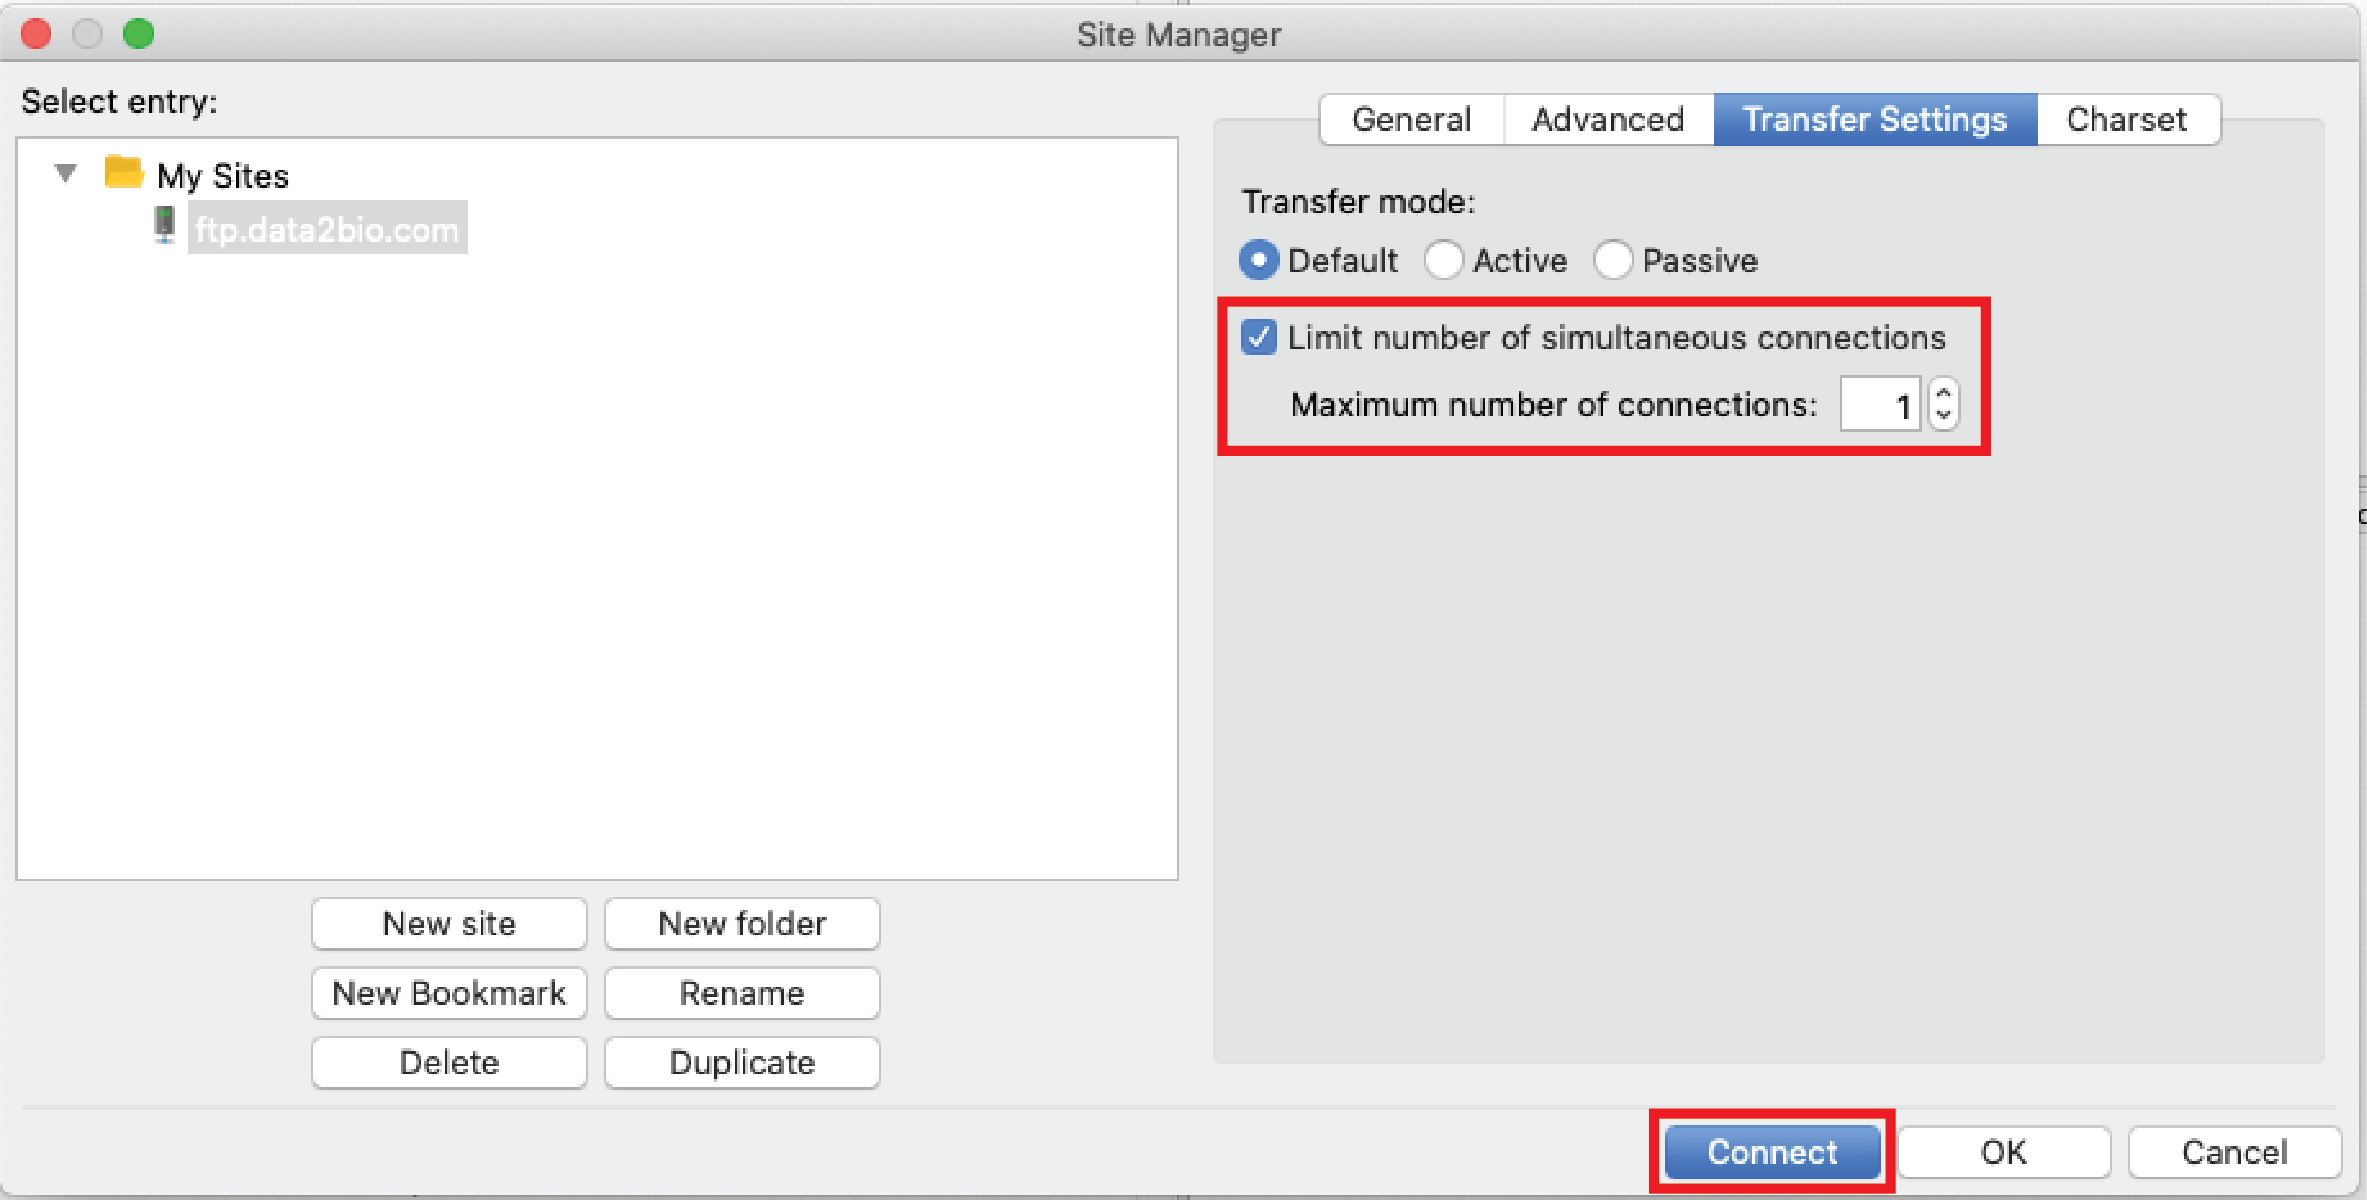
- Select Transfer Settings tab
- Check Limit number of simultaneous connections
- Enter 1 under Maximum number of connections
- Click on Connect to save and to establish the connection
Step 5
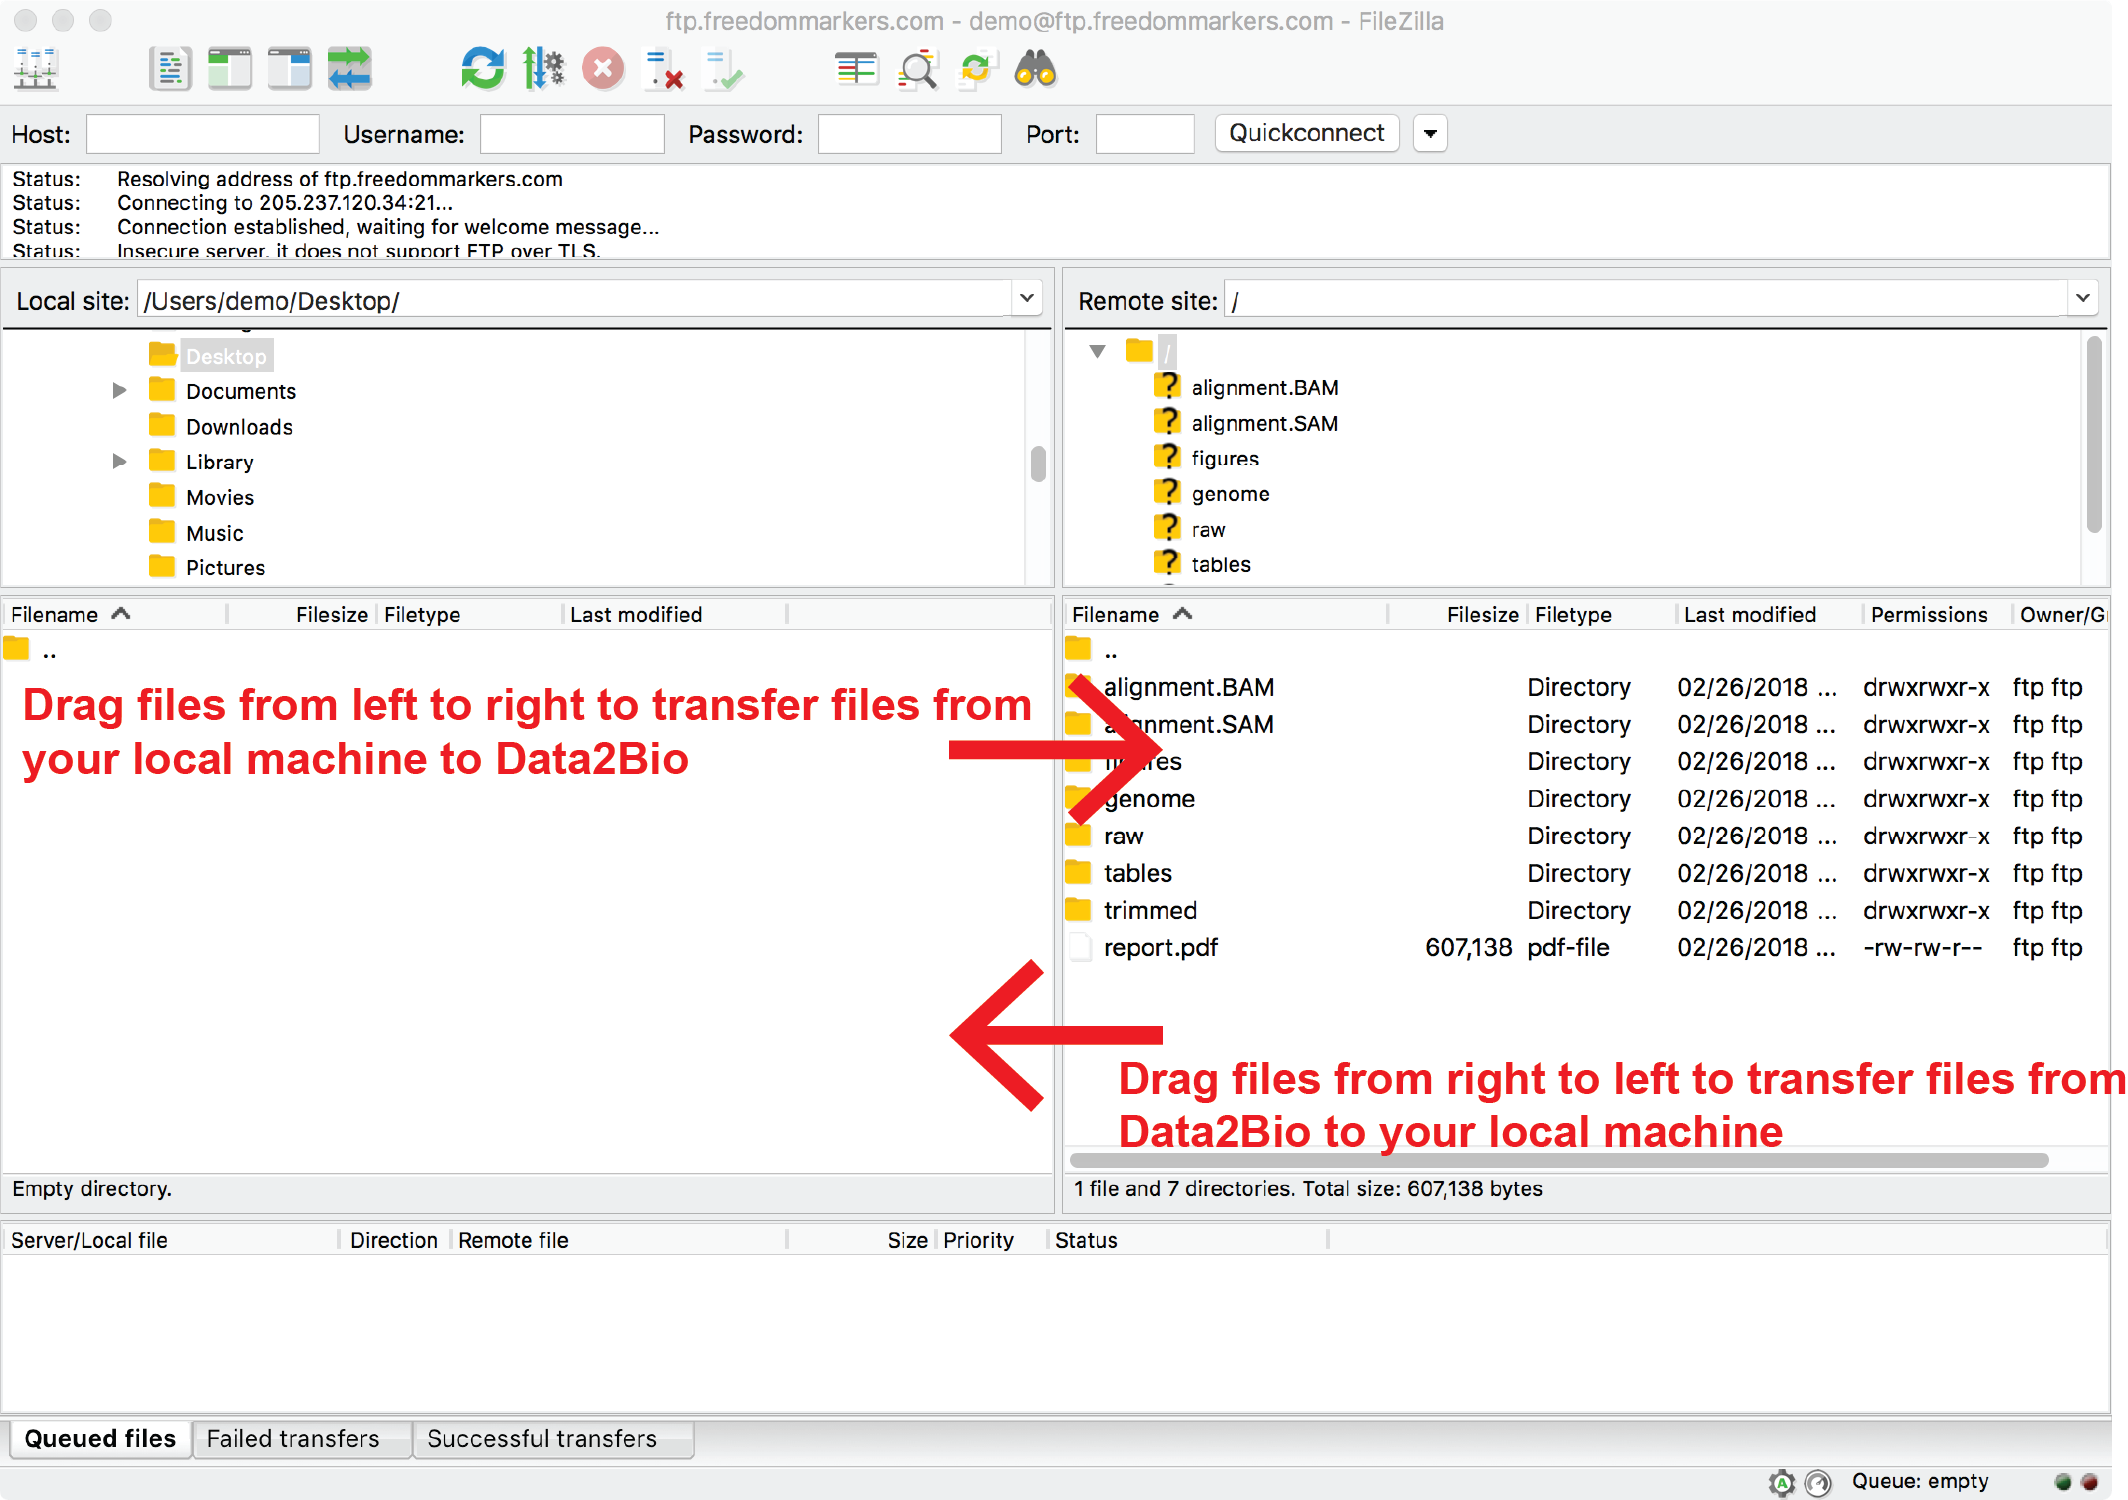
- Once connected, use the left panel to navigate to the desired folder on your local computer.
- To download files from Data2Bio to your local computer, drag files from right to left panels
- To upload files from your local computer to Data2Bio, drag files from left to right panels
A more in-depth and detailed instructions about FileZilla client usage can be found by following the link below: